Comprehensive Audio Recording Manual
Frank Gilbert 04 Mar 2017
The Gear
This recording primer will concern itself with the various recording rigs that are used at the Logan Center for the Performing Arts. The most elaborate system is the Pro Tools HD rig in 243.
Tascam DR-40 Hand-Held Recorder
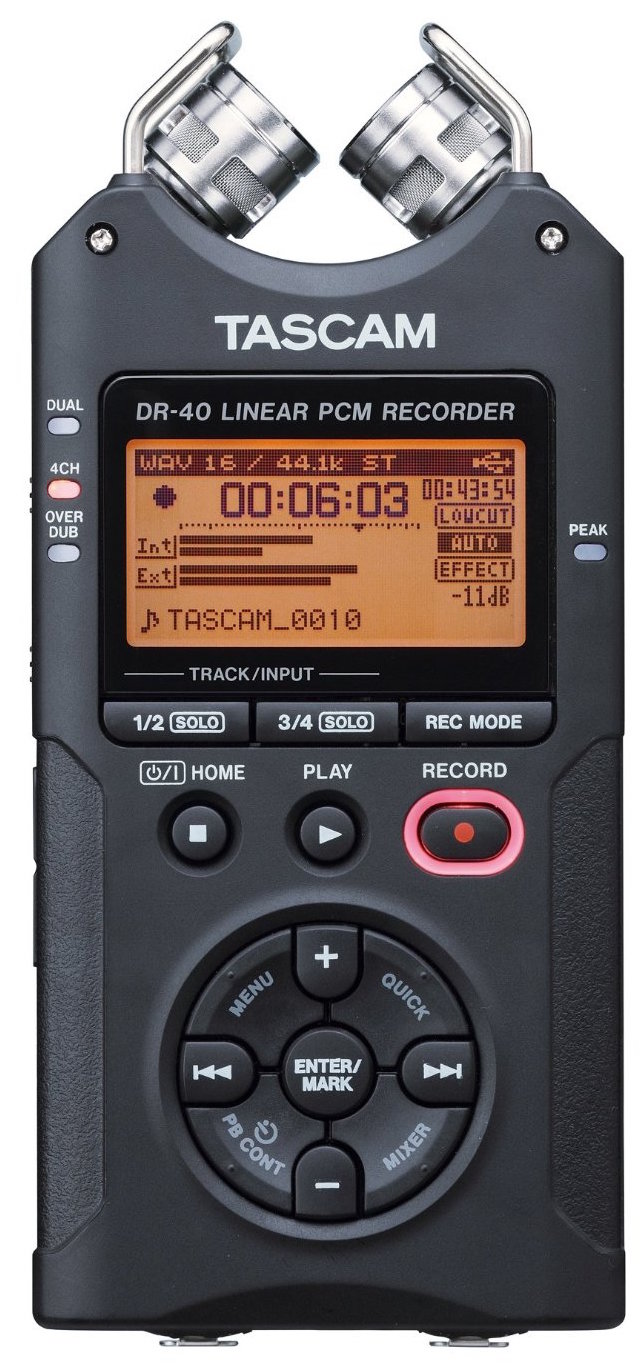
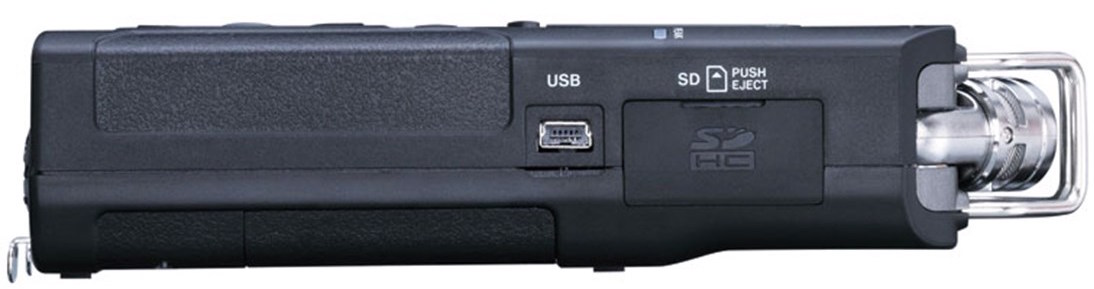
This is simplest and most “set-and-forget” of all the recording systems we have at the Logan Center. All you need to do is make sure there is a blank CF card loaded into the drive (right side), press record twice and you’re good to go. The built-in mics do the rest.
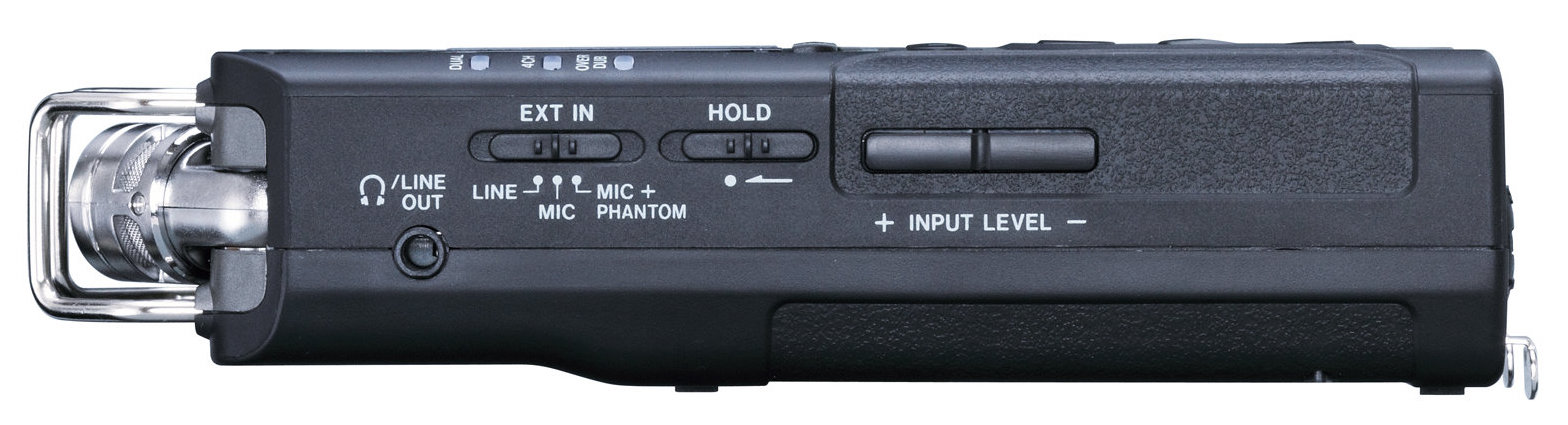
If you want to use the DR-40 to capture an external feed from a console:
- Choose “Line” under the the “Ext In” switch on the side.
- Press “Rec Mode” on the front below the display.
- Scroll down to source. Press “Enter/Mark”.
- Choose “EXT IN 1/2”
There are a few caveats to using the DR-40: It’s important to make sure that you are recording in the right file format. You will mostly be using the DR-40 as an archival recorder so for this purpose mp3s are ok as long as they are above 128k. When you record-enable the DR-40, the display will show what file format is being created. It should be an mp3 of 128k or greater. 320k is best. If it’s less than 128k, audio will still be recorded but the volume will be a bit lower and the sound quality will be greatly diminished, especially at 2k and above (sibilant esses, swirly high-hats, etc.)
In order to change the file format:
- Press stop to make sure the machine is out of record.
- Press the “menu” button.
- The first item is “REC SETTING”. Press “Enter/Mark”.
- First item on the sub-menu is “FORMAT”. Press “Enter/Mark” again. Press + or - until you have selected mp3 of 128k or greater.
Another concern when using the DR-40 is that everything gets recorded to the internal SD card; it will stop recording when the card is full. When you record-enable, the display will show the amount of time remaining on the card. Ensure that the remaining time is longer than your run-of-show. If it is not, you may need to format (erase) the SD card. Hopefully, the previous engineer should have dumped his or her files.
To reformat/erase the SD card:
- Press stop to make sure the machine is out of record.
- Press the “menu” button.
- Scroll down to “OTHERS”. Press “Enter/Mark”.
- Scroll down to “SYSTEM”. Press “Enter/Mark”.
- Scroll down to “QUICK FORMAT”. Press “Enter/Mark” .
When the performance ends, press the stop button and eject the SD card. Bring the SD card to the computer in the recording booth and insert it into the USB SD card reader (or insert it into any cage laptop checked out). Download the content to the Archival Audio file folder and use the naming convention as follows: Year.Month.Date_Description_Engineer.mp3 (Example: 14.3.19_FOTA_Kyle.mp3)
Then, send the file to erinbrenner@uchicago.edu. Go to the website WeTransfer.com -> upload the recording to the site -> enter Erin’s email address -> enter your email address -> press Send. Now go put the SD card back into the handheld Tascam device and you’re done! [On a lot of the other guides Erin has been encouraging me to remove her name so the guides will have longevity, but for this case I’m not sure what the alternative would be.]
If you remember nothing else from this primer, remember recording guy rule number one: check playback. Always check playback. Before the show, record a little bit of the soundcheck, plug your headphones into the left side of the DR-40 hit rewind and listen. CHECK PLAYBACK!
AudioFire Portable Recording Rig
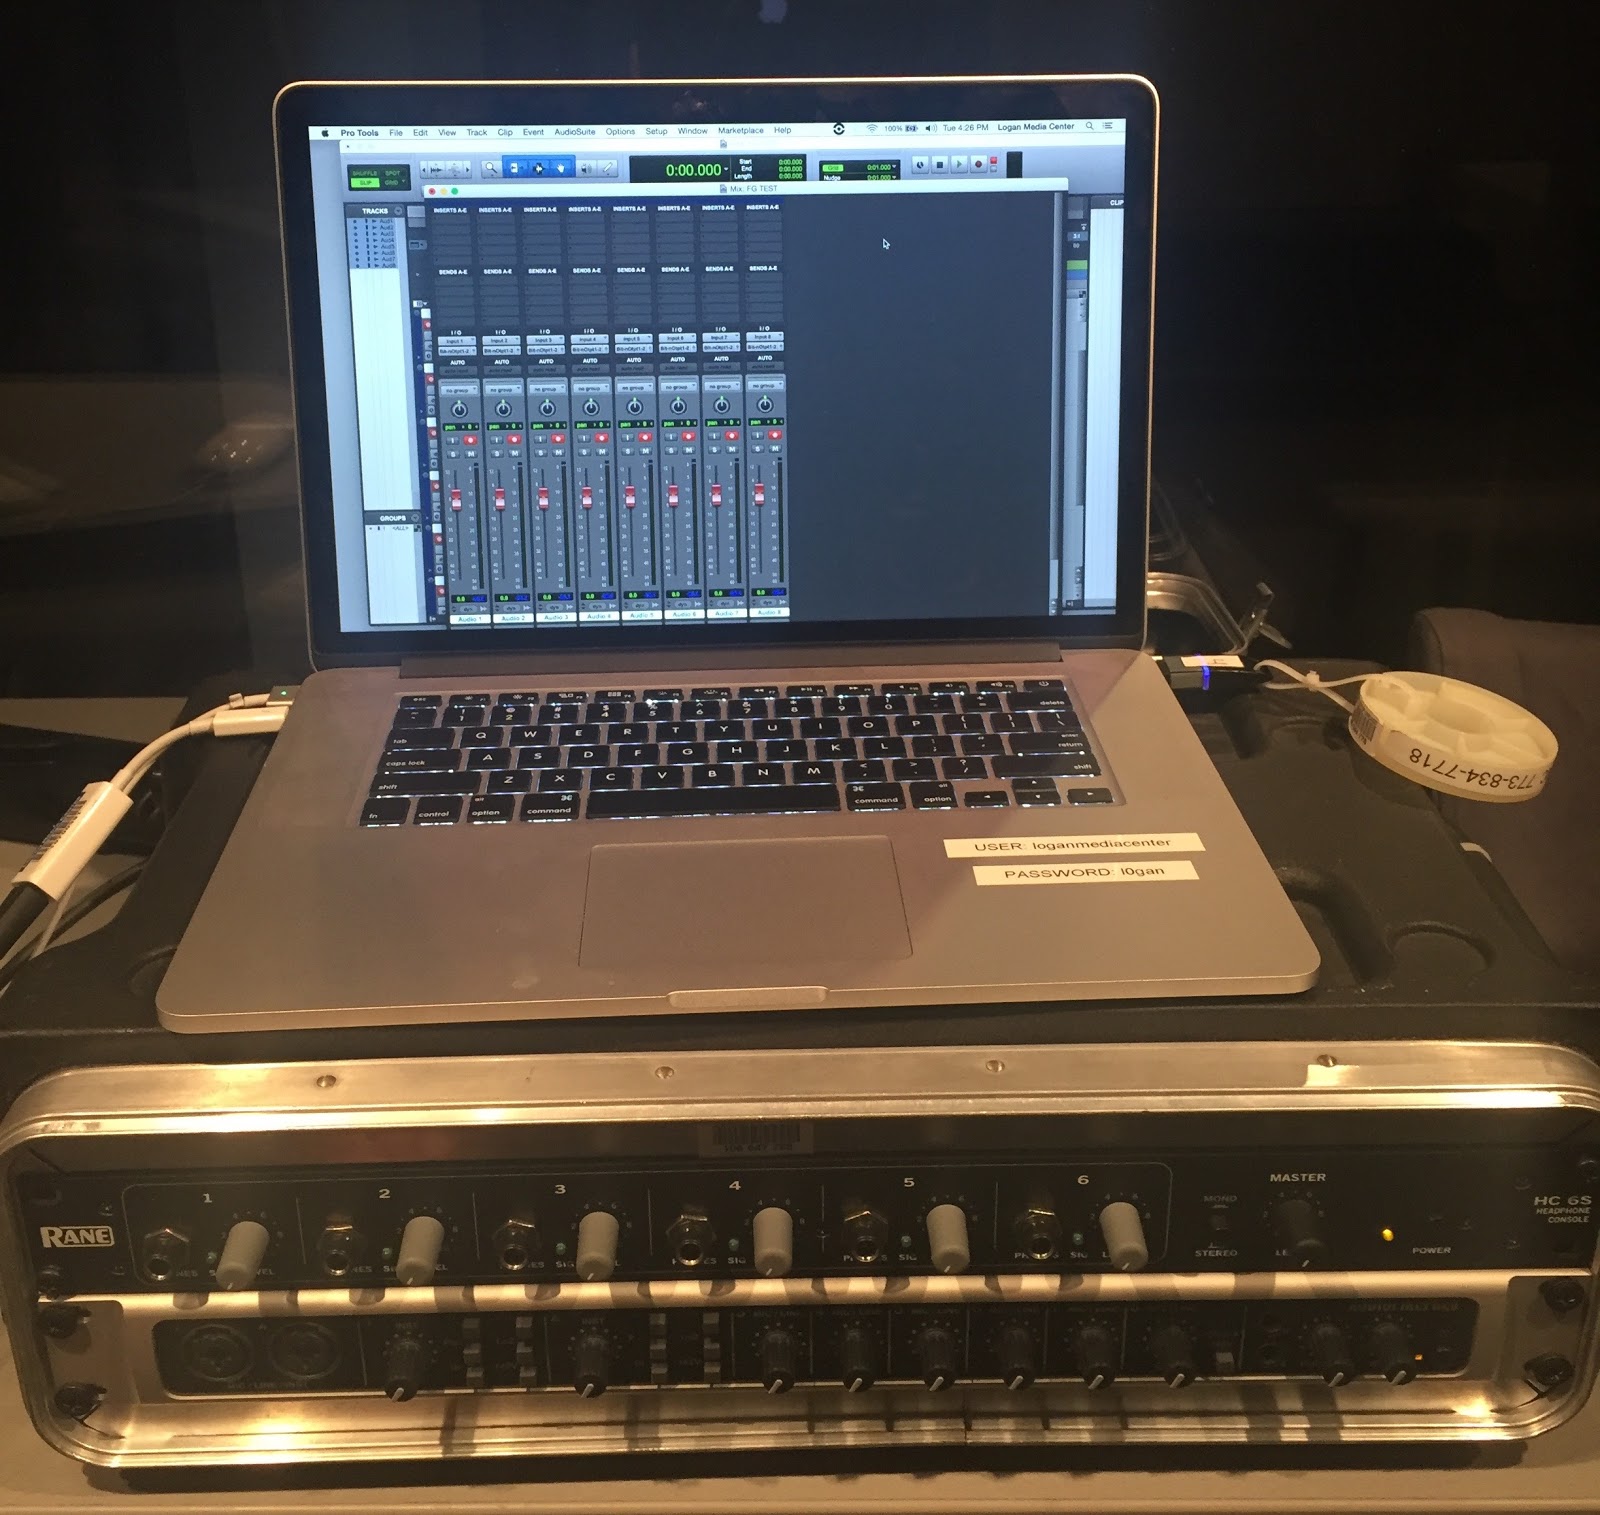
This is an eight channel laptop-based Pro Tools Rig that you will be checking out from the nice folks at the Logan Media Center. Your pack will consist of:
- MacBook Pro
- 2U rack with an AudioFire Pre8 FireWire recording interface and headphone amp (which you probably won’t use..
- ILOK USB dongle (for ProTools to start up)
- Thunderbolt to FW800 adapter dongle
- FW 400 to 800 cable.
PRO TIP: * - Buy your own headphones. Closed-back are best because they dampen the noise of the room. The fancy ones in the PH are not closed-back. They are useless. Also, most of the ones you buy from Best Buy do not deliver a flat response, they tend to hype up the bass (especially Beats by Dre). The cage has some decent ones. Better yet, buy a pair of Sony MDR 7506 or Sennheiser HD280. The cost is around 75-100$. These are indispensable sound tools. If you don’t have the budget, borrow some horrible cans from someone. Even earbuds will be better than open-backs.
Here’s what you need to do to get this contraption working:
- Plug in ilok USB dongle.
- Connect AudioFire interface to laptop via Firewire 400-800 cable and Thunderbolt adapter.
- Don’t connect headphone amp. You won’t need it. Connect your headphones directly to the headphone out on the AudioFire interface.
- Power on the interface and the Mac Pro.
- Launch Pro Tools app. There should be an alias for it in the dock at the bottom of the screen.
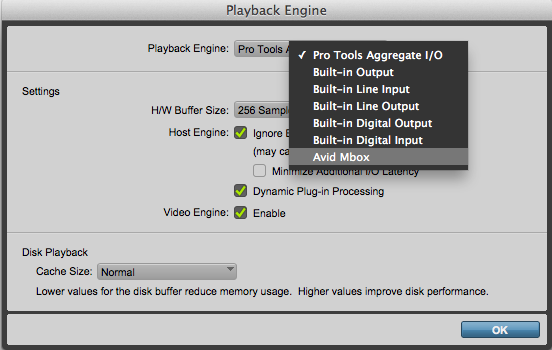
- Once the app is loaded, go to the “Setup” pull-down menu at the top and choose “Playback Engine”. A window will appear showing options for various settings such as “H/W Buffer” and “cache.” At the top of this window there should be another menu also labelled “Playback Engine”. Go to this menu and choose “AudioFire Pre8”. Do not select Pro Tools Aggregate I/O. This menu tells Pro Tools which hardware is routing audio in and out of the machine.
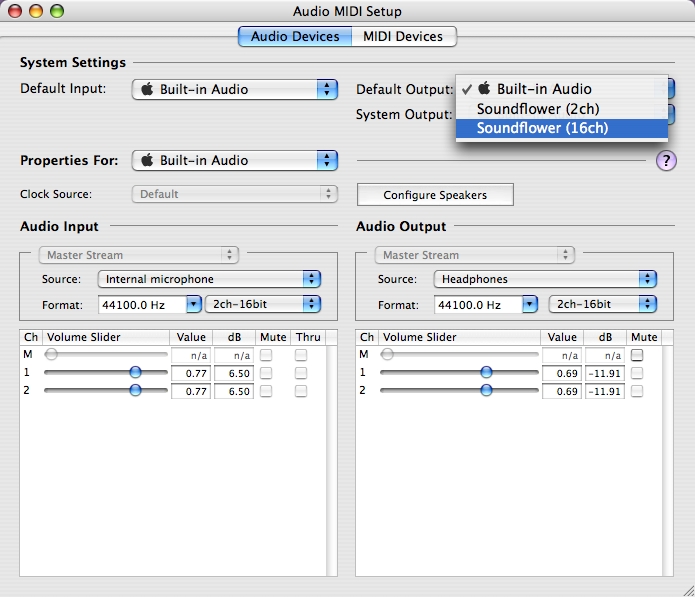
- If “AudioFire Pre8” , “HDX” or the interface in question is not available in the “Playback Engine” pull-down menu, find and launch an OSX Utility called “Audio/MIDI Setup. This software tells Mac OS which audio hardware is connected and present. You will see a variety of choices. One of them should be the interface hardware. Make sure it is selected as the input / output device and the little microphone and speaker icons are visible next to it. Repeat step 5.
-
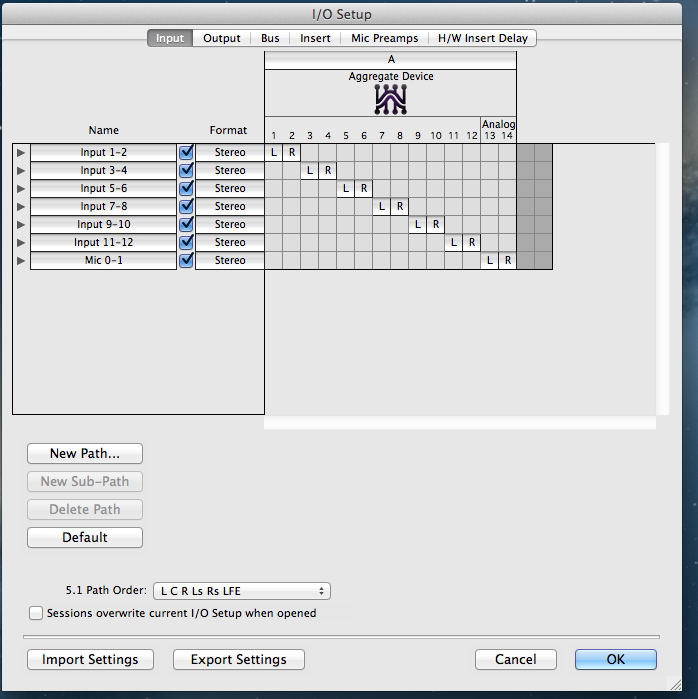
Now go to the “Setup” menu again and choose I/O, This is where you set up and assign in and out pathways for your hardware and bus them to corresponding channels in Pro Tools. At the top of the box you should see the AudioFire interface (or the two HD Pres in the case of the HD rig and not the laptop interface from the cage.) There should be a channel grid corresponding to the ins or outs of the hardware. If there is no grid, go to “New Path” create 8 new inputs. Click the”Outputs” tab and create one stereo out. We know that the Audiofire 8Pre is an 8-in 2-out hardware interface. We are creating 8 paths for input and 2 paths for output (the stereo L/R for monitoring via speakers or headphones. If you were using the HD rig you would be able to create some variation of 16 mic pre inputs and 32 line level inputs plus as outputs.)
-
Go to the “File” menu in Pro Tools and select “Create New”. Name your session, make sure file type “wav”, sample rate “48k”, bit depth “24-bit”.
-
Go to “Track” pull down menu and select “create new”. Make 8 new tracks. This is the most that you can record at one time with this interface. Label all the tracks with the corresponding input or mic name in the text box below the fader.
-
Now it’s time to run lines. You may be taking all direct outs from the FOH guys desk (make sure you have plenty of TRS to XLR-M adapters, unless he has a large format console with xlr direct outs). You may be running all your own mics to capture a totally acoustic performance. Most times it will be a combination of both. We can spend many many pages talking about micing theory, but for this purpose let’s assume that there is a small ensemble of musicians, say a jazz trio of piano, upright bass, and a drum kit in a small room. In a lot of situations like this live engineer will probably only be micing the kick drum, taking a DI from the bass, a pair of condensers on the piano (PNO LO and PNO HI) and maybe a talk mic. He figures he doesn’t need overheads for the drums; cymbals are loud and the room is small. But here’s what your input list might look like:
- Kick (direct out from FOH)
- OH Ride (home-run to your interface)
- OH Hat (home-run to your interface)
- Bass DI (direct out from FOH)
- PNO Lo (direct out from FOH)
- PNO Hi (direct out from FOH)
- Talk Mic (direct out from FOH)
- Room (home run to your interface)
PRO TIP:* - When micing a grand piano with two mics, it is best to think of the mics as “piano low” and “piano high” instead of “piano left” and “piano right”. You are capturing the bass side (musician’s left hand) and the treble side (musician’s right hand) of the strings on the soundboard. You will want to pan them left and right, but not all the way (there is some overlap, especially if it’s a solo performance at full-stick with large diaphragm condensers. Position the mic capsules facing the fall board halfway between the treble bridge and the dampers. Closer placement to the keyboard/action/pin block will produce more attack and further away will produce more resonance. This is a decision the engineer can make based on the player and the style of music. Put your headphones on and pan until you have a pleasing but not extreme stereo image. 9 and 3 (o’clock on a rotary pan knob) or 10 and 2 is a good place to start. If you are taking a stereo DI from an active electronic keyboard such as a Nord Stage or Yamaha Motif, pan hard left and hard right and forget about it. All panning is mapped within the software inside the instrument.
There are no hard rules, but in this situation you’ve covered all the instruments well. And you have also have lines coming from two sources that might seem like an afterthought: the talk mic and the audience (room.) Just because jazz is frequently instrumental doesn’t mean that the performers don’t talk to the crowd. They always do and you need to capture that and you also need to capture audience reaction. That is what your room/crowd mic is all about. Ideally you should have a minimum of two condensers or shotguns focused into the crowd. In this situation you only have an 8 channel interface so one is better than none. You can even swap one of the drum overheads out for stereo room mics. The great thing about ambient mics is that they pick up a lot of the “air” in the performance. This is the blended ambience of the ensemble playing together and can make the sound a little wetter. Sometimes direct or close sounds can be a little dull and lifeless all by themselves. Once you have set all that up, re-save and start getting levels. I like to aim for peaks at -3 in pro tools, but it’s generally very forgiving about overs.
Pro Tools HD Rig
While the HD rig in 243 may seem intimidating, everything about the graphical interface is the same as Media Center’s portable recording rig. It only seems more daunting because of all the rack gear in the recording booth of 243, but all of the software is the same. The gear that you see in the rack performs very basic functions. There are two HD Pres in the rack providing a total of 16 mic inputs. (some are broken.) In addition to this there are an additional 32 channels of analog line-level input provided by the two HD i/o units above the HD pres.
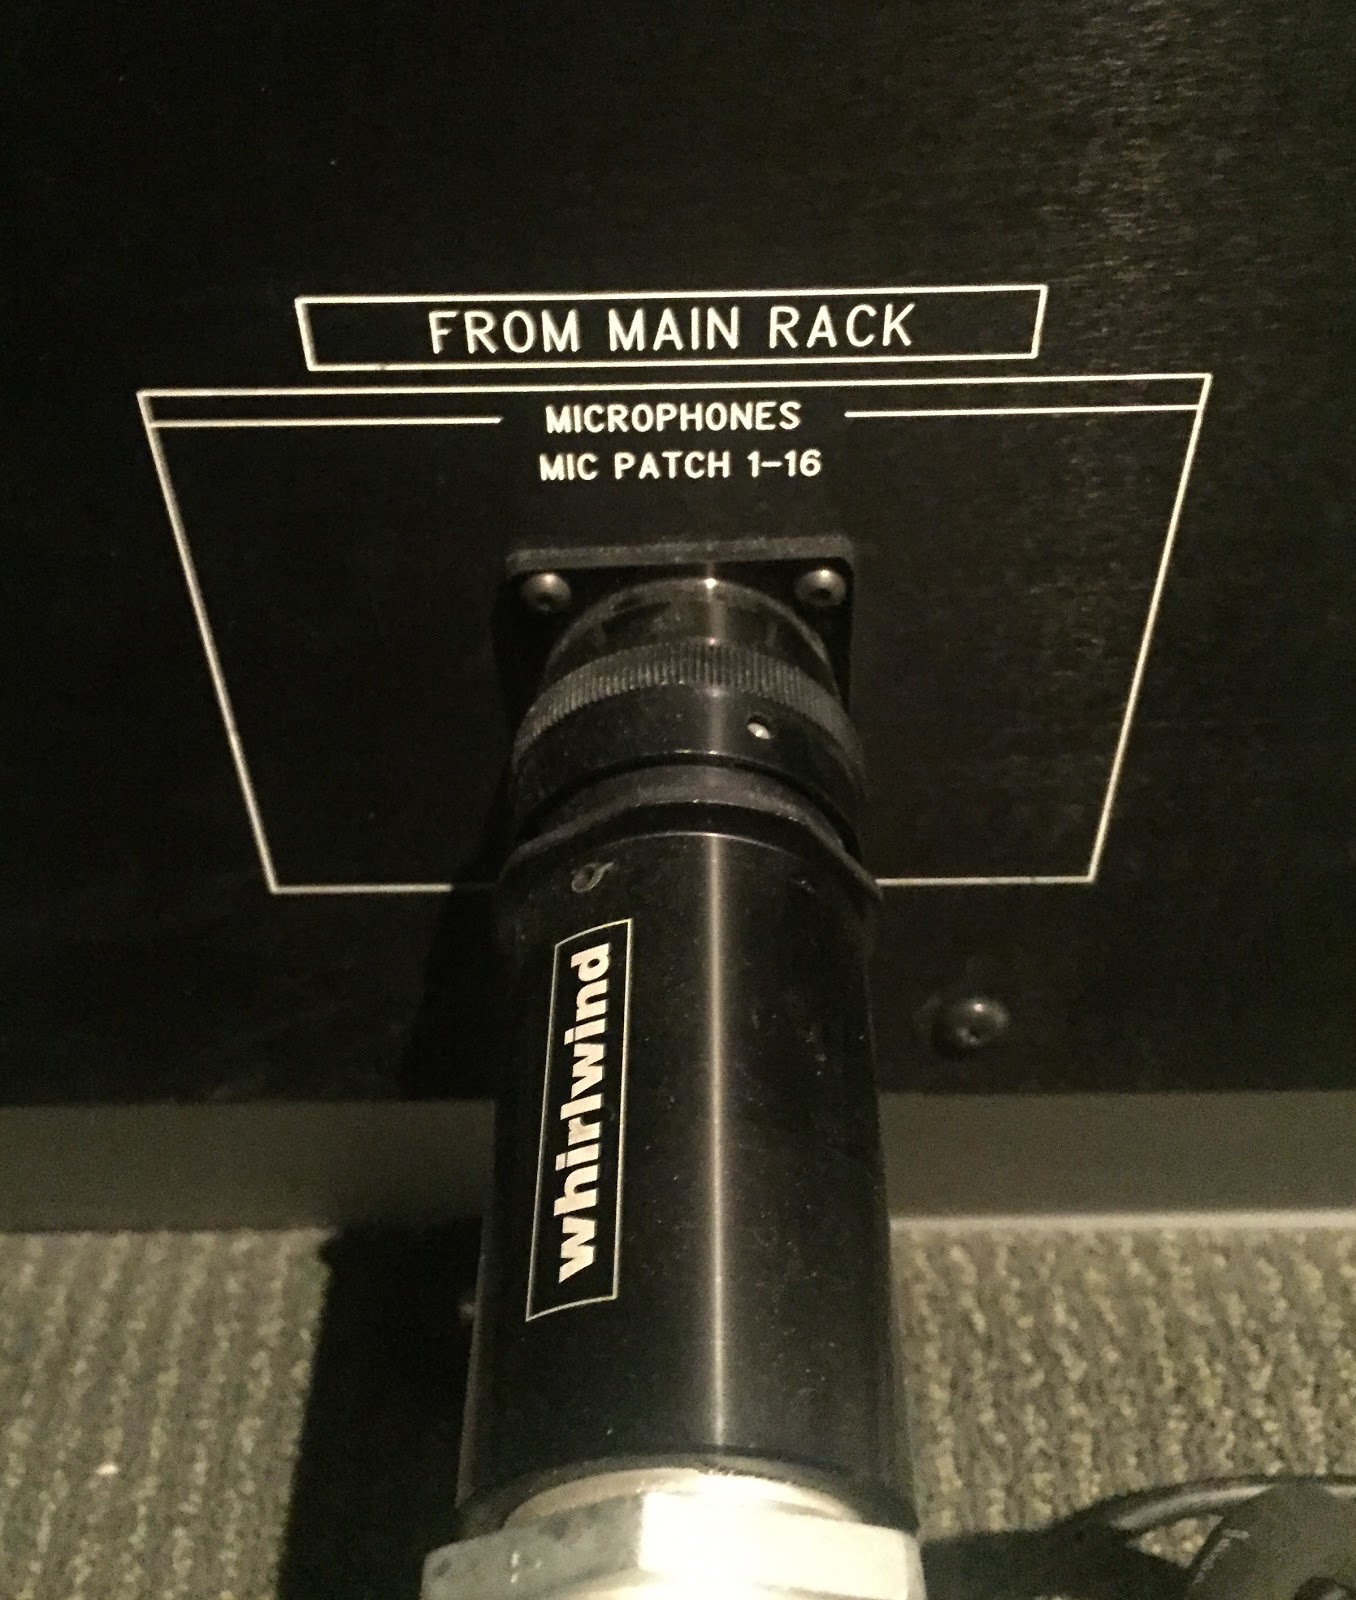
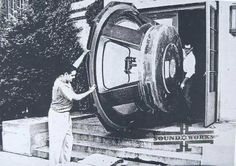
Everything about session setup is exactly the same except steps 1-2 involve patching mic lines from the fanout in 243 (see pic) and in steps 3-8, you are looking for the HDX and HD I/O interfaces.
After the stage is wired up, the patchbay in the amp room is where all your mic lines get assigned to the recording booth inputs and all signal-splitting occurs for anything that is being fed simultaneously to the FOH SC48 in the Performance Hall. The cross-patch is where there is a lot of potential for mistakes. This is because what is going to FOH from the stage is not always exactly the same as what is going to the recording booth. Recording engineers often add crowd mics, kick in, snare bottom, ambient mics and anything else that might not be critical to the house, but will add very noticeable elements to a playback mix.
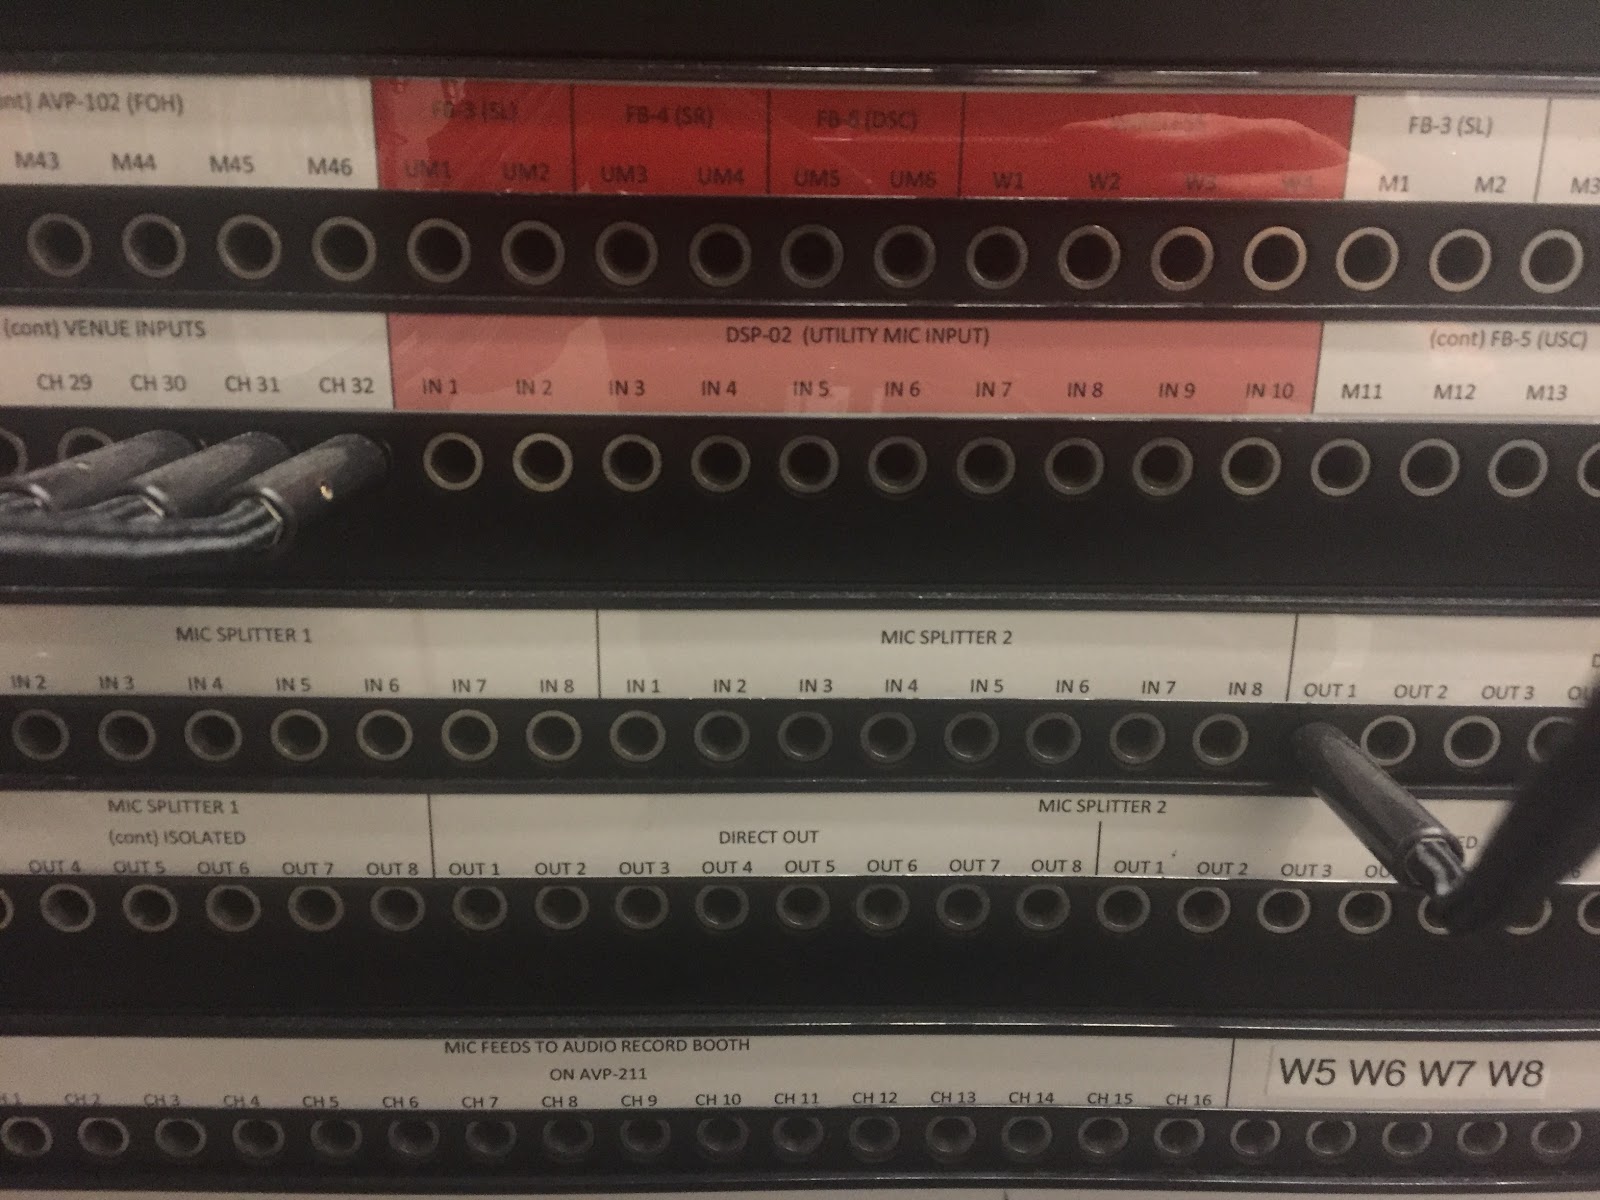
When you are building your crosspatch, remember to split anything that is going to FOH and the record booth simultaneously via the transformer isolated splitter in the patch bay. Usually the direct side will go to to the Venue inputs and the iso side will go to the record booth. Any inputs requiring phantom power (+48V) that are split in this manner will be powered by the SC48 at FOH (condensers, active DIs etc.). Anything that requires phantom but is not getting split will be powered by the pres in the HDrack in the recording booth.
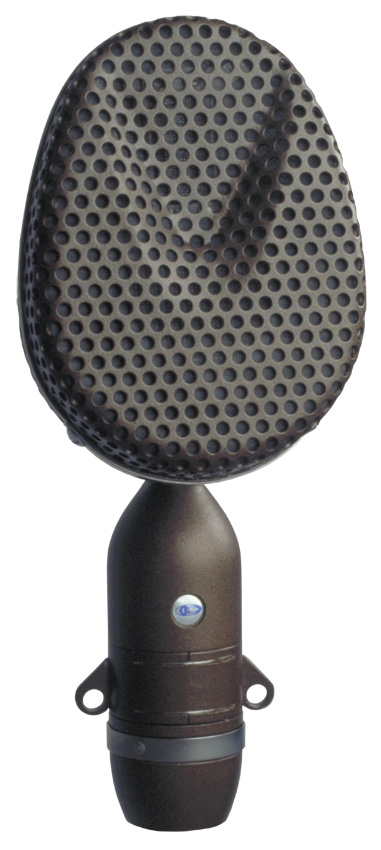
CAUTION:* - Be careful to never apply phantom power to a ribbon mic. You might blow up the ribbon. Some of today’s newer ribbon mics are designed to withstand this mistake, (especially the Shure KSM line), but it’s still a bad move. You don’t want to be the rookie A2 that blew up the veteran engineer’s Coles 4038, and it can happen without you even knowing it. A ribbon mic often will still function after phantom has been applied; that alone doesn’t always cause the problem. It’s the transient generated when a microphone is hot-plugged into an input with active phantom power that can sometimes damage the microphone and possibly the preamp circuit of the input. This can very easily occur at the patchbay, in that moment upon patch cable insertion when pin one (Ground +48V) goes down the wrong leg of an XLR. Bammo.
Every time you fire up the rig, turn on Big Ben first, make sure he is at 48k. Higher resolutions will work also, but not recommended. Then fire up the HD hardware and then the Mac Pro. Always make sure the hardware is set to “HDX” and not “Pro Tools Aggregate I/O” both in “Playback Engine” as well as “Audio/Midi setup.” After you have your session loaded, make sure Big Ben is at 48k again and all hardware is in sync.
PRO TIP: * 24bit / 48k bitrate and resolution is recommended because it’s more or less the industry standard. If you do a blind test, you will not notice an audible difference between 48k and anything higher than that. Even if you placebo your brain into thinking that you do hear a difference, it won’t be worth the massive extra hard drive space that a 92k session eats up.
If you are having a word clock mismatch you will not hear it in Pro Tools while you are recording because you are monitoring on the input side. All you can do is remember recording engineer rule #1: check playback. check playback, check playback.
When you are re-starting a session on the show day that you created on a rehearsal day, after you make sure that your hardware set-up is clocking right and HDX is your playback engine, roll tape while the musicians are tuning up and then press stop, rewind and check playback.
Don’t assume everything is locked and fine just because everything was working on rehearsal day when you created the session. Who knows what was happening on the rig between rehearsal and show? Roll tape and check playback.
Anything can cause the hardware to unlock between rehearsal day and show day. Some may argue this point, but I have had it happen from a different hardware interface (MBOX etc) being connected via usb or something as dumb as spotify or itunes software update or other playback software being installed. Audio/Midi Setup sees a different device or software and presto: the next time you start your session, Pro Tools isn’t clocking right.

Working in Pro Tools

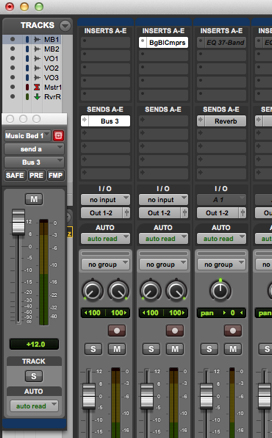
Pro Tools is an elegant interface for grouping similar tracks together, sending/returning tracks to/from virtual effects, inserting dynamic processing, building a mix and the like. These are all tasks that should be taken care of at the mix stage. You should not have to worry about FX and dynamics. However you might want to print a stereo mix (2-mix) of the recording in real time for reference purposes. This is a very simple task. Go to “Track” menu and select “New” , the same as you would for all new tracks. Except this time, create a single stereo track. Label the track “Stereo Mix” or “2-Mix” in the text box below the fader. Place it at the very end of the mix window by dragging and dropping. Press “M” on the channel strip to mute the output. Go to the “In” pull-down menu on the strip and select any unused stereo bus as the input. Now go to all the tracks and select the same bus send on each channel to route all the input tracks to that stereo channel. Make sure each bus send is at unity and that “FMP” is selected. This way all your fader moves and panning will be sent to the 2-Mix. A few caveats. Create a rough board mix during the soundcheck or during the first song of the performance. Don’t do any serious mixing after you’ve got a rough mix pulled because if you accidentally hit the spacebar while the band is performing, you’ve just stopped the tape and shot yourself in the foot. In live multi-tracking, there is no “take two.”
PRO TIP: * - In Pro Tools you can hotkey toggle between the mix window and the edit window using “command =”. If you hold down “option” and “shift” while you are assigning channel i/o functions, Pro Tools will automatically copy assignments to any channels that are selected.
Theory vs. Practice: “Art” vs. Practicality in the Heat of Battle
Live sound is about preventing signal from sounding bad as quickly as possible in less than ideal conditions; recording is about taking all the time you need to get things to sound perfect in the studio. Multi-tracking a live event falls somewhere in between. Capturing a face-melting improvisation by a quartet of jazz virtuosos can be a one-of-a-kind experience. Conversely, being tasked with multi-tracking a 10-hour festival of cover bands with 10-minute changeovers might seem like the worst of both worlds. (Why anyone would want to multitrack that is beyond me, but it happens, and you should smile and take the money.) Just remember, your job is to capture the performance and nothing else (not even mixing… for now.) You must work well with the musicians and the other techs on the gig to make sure that you get all the instruments to tape clean and clear, with minimal bleed and buzz. If you can get along with people and point a mic at the source, then the rest will take care of itself. This is not art. This is problem solving.
Be Cool or Go Home
Even if you are working in a state-of-the-art mobile truck, kitted out with a fully transformer-isolated split, a Neotek Elite console, tens of thousands of dollars in boutique condenser microphones and tons of fancy outboard gear, you are still the “other guy on the gig.” The house crew and the touring guys and gals really don’t care about you. The techs are already annoyed that you’re there because the very presence of your gear raises the noise floor of the PA and they don’t want to deal with helping you run your cable, tie-in your power or wait for you to dial in your super-sweet snare tone. You are the last concern of anybody on the stage, no matter who hired you. How do you overcome this hurdle? Don’t make anybody wait. Pay attention. When the FOH/monitor engineer starts tapping through their mic lines, be ready. They will not wait for you. And always, always, always BE NICE OR LEAVE THE GIG. You can be the greatest mix engineer in the world with the worst attitude, or you can be stone deaf (it’s true) and still be be super helpful. Guess who gets called back, every time? Hint: nobody who runs crew ever talks about how awesome that bari sax mic placement sounded. But they definitely remember which guy or gal acted like a jerk to everyone on the gig and also the one who ran a bunch of cables across the stage quickly/neatly and with a smile.
Garbage In = Garbage Out

Being a capable audio tech is not alchemy. This is a completely learnable trade. You don’t even really need good relative pitch or the ability to keep a beat (yes it helps, but only a little). As you gain confidence, you will realize that even though you have done your job well, the end result can still sound bad. This is not your fault. The problem usually lies with the people on-stage. Consoles don’t have “suck” knobs that you can turn down (yet). This is where your people-skills will be invaluable to you. After folks realize that you really do care, the guitar player might listen when you politely ask them to turn down, or you might ask a timid vocalist to hold the mic right next to their mouth. In this way, you can help the musicians “suck less”. If you are unwilling to help people create music that you dislike, this is not the job for you. That said, anyone can learn how to be a sound engineer.